Tap into the latest, vibrant, and dazzling designs that’ll make your nails the talk of the town!
Receiving compliments on your nail art feels exhilarating, doesn’t it? After all, our nails are more than just keratin layers. They’re an extension of our unique personalities, and their adornment becomes a delightful canvas for our style, emotions, and pzazz.
Golden Tips Before You Begin:
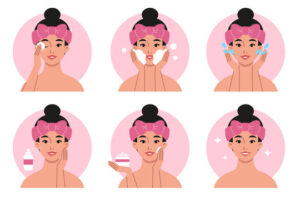
Pristine Palette: Before you even think about colours and patterns, ensure your nails are clean. Even if you’re sans polish, swipe your nails with a cotton pad soaked in polish remover. This rids them of any lurking dirt or oils, ensuring a flawless foundation for your art.
Smooth Moves: Buff those nails! It’s not just about making them shine but also about creating a smooth canvas. Buffing helps eliminate any ridges or unevenness, prepping them perfectly for your base coat.
Quick Set: Want your polish to set faster post-application? Pop your fingers into the freezer for a couple of minutes after each step. It’s a quirky yet effective trick to speed up the drying process.
UV Caution: Let’s keep those lovely hands safe. Minimise the use of UV nail dryers, as they can hasten skin ageing and up the ante on cancer risk. If you absolutely must use them, show your hands some love by applying sunscreen first.
Feeling stuck in a rut with your usual monotone or pastel manicures? Well, it’s time to infuse some zest into your nail routine. We’ve curated the hottest nail art designs for you, complete with easy-peasy tutorials to depict various moods. So, gather your tools, get comfy at home, and let’s get those nails looking all kinds of fabulous!
Effortlessly Chic Nail Art Designs for Beginners and Nail Buffs
1. White and Orange Flames Nail Art
This nail design is all things vibrant, fresh, and youthful. The sun-kissed combo of colours is ideal for those balmy summer vibes. Fancy trying it with another palette? Go right ahead and mix things up!
Essentials:
- A pristine white nail polish
- Zesty orange nail polish
- Sunlit yellow nail polish
- Midnight black nail polish
- Nail art striping tapes
Tutorial:
- Lay down your canvas with two coats of the white polish.
- Crisscross the strips diagonally and brush on a lively coat of yellow.
- Add another strip vertically down the centre, and paint a splash of orange on one side.
- Arrange your strips as guided and dab on the black at your nail’s base.
- Seal with a clear polish, and voilà – summer on your fingertips!
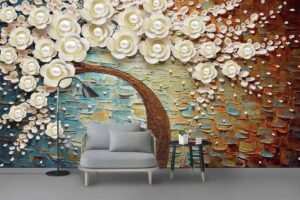
2. Purple-Pink Floral Majesty
Isn’t this just the epitome of floral elegance? This pink and white rendezvous reminds you of blooming spring gardens. Simple yet sophisticated, it’s your go-to for both bleak rainy days and sun-drenched afternoons.
Essentials:
- Snowy white nail polish
- Blushing pink nail polish
- Royal purple nail polish
- A deft nail art brush or a precision nail art pen
Tutorial:
- Start with a snowy canvas of two white polish coats.
- With your slender brush, sketch flowers using the pink hue.
- Accentuate your pink blossoms with dabs of purple for added flair.
- Crown with a top coat.
Fancy a twist? Paint blossoms across the entire nail or swap out your white base with another pastel shade.
3. Colour Splash Symphony
Here’s a masterpiece that turns your nails into abstract art. Dive into this look that’s as exciting to create as it is to flaunt.
Essentials:
- Crisp white nail polish
- An angled nail art brush
- Oceanic blue nail polish
- Lavender purple nail polish
- Rosy pink nail polish
P.S.: Feel free to play around with your favourite colours – the world is your palette!
Tutorial:
- Prep with two coats of a white polish backdrop.
- Once settled, immerse the brush in blue and, with a flick of your thumb, let the colour cascade onto your nails.
- Dance through this rhythm with each hue until you achieve your desired masterpiece.
- Guard your artistry with a top coat, and there you have it – a burst of colours at your fingertips!
4. Colourful Clouds Nail Art
Float through your day with this ethereal and whimsical nail art that paints the skies on your fingertips. Ideal for the sunnier seasons, this design primarily highlights the ring finger while the rest are bathed in a refreshing aqua green-blue shade.
Essentials:
- Refreshing aqua green-blue nail polish
- Blush pink nail polish
- Sky blue nail polish
- A delicate nail art brush
Tutorial:
- Paint all nails in aqua green-blue, save for the ring finger.
- Delicately apply pink polish on your ring finger.
- With the sky blue polish, use the brush to craft cloud patterns—begin with vertical lines as depicted.
- Once settled, layer with green-blue polish, tracing additional clouds atop the blue backdrop.
- Finish with a clear top coat for a glossy finish.
5. Diagon-Alley Pink and Yellow Nail Art
Journey through a dazzling intersection of colours with this vibrant nail art. No need to splurge at nail salons when you can effortlessly don this trendy look right at home. It’s the perfect splash of colour to brighten up both your attire and spirit.
Essentials:
- Lush purple-pink nail polish
- Sunny yellow nail polish
- Soft peach nail polish
- Nail art striping tapes
- Glossy top coat
Tutorial:
- Lay down a cheerful base with yellow polish.
- Draw a diagonal with the peach polish across the lower nail segment.
- Mirror this motion using the purple-pink polish, crossing the opposite direction.
- Crown your creation with a glossy top coat, and you’re set!
6. Plastic Wrap Texture Nail Art
Combine the ethereal glow of gold with the serenity of light blue for a nail art that’s both refined and bold. The plastic wrap technique is an inventive way to achieve a unique, marbled texture, suitable for both casual outings and glitzy events.
Essentials:
- Serene light blue nail polish
- Gleaming gold nail polish
- Plastic wrap
- Crystal clear polish
Tutorial:
- Begin with a solid gold base using two generous coats.
- After drying, cloak the gold with a layer of light blue.
- While still tacky, press crumpled plastic wrap onto the nail, creating an intriguing pattern as the gold peeks through the blue.
- Seal the masterpiece with a clear top coat for a lasting impression.
7. Pristine White Chevron Magic
The power of minimalism is showcased brilliantly with this chic design. White nails always exude a touch of elegance, making this the perfect look for both casual days and special occasions.
Essentials:
- Pure white nail polish
- Fine nail striping tapes
- Gleaming clear polish
Tutorial:
- Arrange the striping tapes over your nails to craft three precise Vs.
- Paint a neat white tip on your nail.
- With a slender brush, fill the chevron pattern with white.
- Carefully remove the tapes whilst the polish is fresh.
- Finalise with a clear polish for a polished look.
8. Striking Striped Aztec Elegance
At first glance, this looks like intricate nail artistry. But, with our breakdown, it’s just a matter of a few easy steps. The delightful colour mix is undeniably a standout feature.
Essentials:
- Crisp white nail polish
- Midnight black nail polish
- Rosy pink nail polish
- Glimmering gold nail polish
- Sleek brush
- Fine nail striping tapes
Tutorial:
- Start with a white canvas by painting your nails.
- After drying, employ the striping tapes and brush on the glittering gold stripes.
- Follow suit with the pink stripes.
- Add a bold statement with a black stripe near the nail tip.
- Craft the detailed Aztec design with a fine brush as shown.
- Enhance by positioning triangles in the centre.
- Coat with a clear polish for longevity.
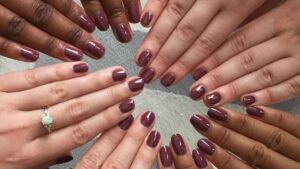
9. Romantic Pink Ombre Dream
This gradient pink design screams cuteness overload. While we’ve showcased it in pink, let your imagination run wild with any colour palette. It’s straightforward and undeniably pretty.
Essentials:
- Delicate light-peach nail polish
- Vibrant pink nail polish
- Toothpicks
- Makeup sponge
Tutorial:
- Begin with a soft light-peach base coat.
- Dispense a bit of both polish shades onto a pristine surface or plastic sheet.
- Mix the hues marginally using a toothpick.
- Immerse the sponge into the blended colours.
- Gently stamp the sponge onto your nail, creating the gradient effect.
- Lock in the design with a layer of clear polish.
10. Glistening Gold Glitter Fantasy
Elevate your glamour quotient with this gold-infused sparkler! Perfect for days when you want to shimmer a little more than usual, this design is as captivating as it is effortless.
Essentials:
- Gleaming gold nail polish
- Blushing pink nail polish
- Classic black nail polish
- Sleek thin brush
- Handy dotting tool
Tutorial:
- Lay down two lustrous coats of gold nail polish.
- With the dotting tool, artfully place pink dots at the corners.
- Intermittently outline the pink with black, as pictured.
- Seal the design with a clear polish for added shine.
11. Sophisticated Smokey Grey Allure
Embrace the mysterious charm of this smokey grey design. It’s intriguingly dark yet has a touch of sparkle that adds a beautiful twist.
Essentials:
- Deep smokey grey nail polish
- Sparkling glitter
- Transparent polish
- Fine brush
Tutorial:
- Paint a dark grey base coat.
- On a fresh surface, blend the grey polish with craft glitter.
- With a fine brush, apply this glittery mix to the nail tips, as shown.
- Finish with a clear polish for a glossy, smoky effect.
12. Elegant Chocolate Gold Majesty
This heavenly combo of chocolate brown and gold is nothing short of chic sophistication. The rich brown paired with the glimmering gold offers a touch of luxury to your fingertips.
Essentials:
- Rich chocolate brown nail polish
- Gleaming gold nail polish
- Adhesive tape or triangular nail stickers
Tutorial:
- Begin with two indulgent coats of chocolate brown nail polish.
- Position the tape diagonally across the nail, forming a triangle, as illustrated.
- Fill the triangular area with a luxurious coat of gold polish or employ a gold triangular sticker.
- Complete the look with a clear polish for lasting elegance.
Whether you’re a fan of the glitz and glamour or the dark and alluring, these designs offer something unique for everyone. With just a little patience and creativity, you can adorn your nails with these fabulous designs. Why not give them a try and make every day a statement nail day?
13. Lucky Clover Radiance
Add a touch of good fortune to your nails with this serene four-leaf clover design. The gentle hues of pale yellow and green make this a delightful pick for those who want simplicity with a touch of charm.
Essentials:
- Soft pale yellow nail polish
- Fresh green nail polish
- Delicate thin brush
Tutorial:
- Begin by applying the pale yellow polish as your base coat.
- Using a thin brush, draw heart shapes with the green polish to form a four-leaf clover, as depicted in the image. For a seamless design, consider using nail stamping if you’re not comfortable drawing the hearts freehand.
- Add delicate white strokes to the green hearts for added dimension.
- Complete your luck-inspired design with a clear polish for a glossy finish.
14. Oceanic Hues: Two-Toned Blue Majesty
Dive deep into the oceanic charm with this two-toned blue nail design. It’s the perfect blend of subtlety and shimmer, apt for a breezy day by the beach or a classy evening out.
Essentials:
- Tranquil light blue nail polish
- Enchanting dark blue shimmer polish
- Precision nail strips
Tutorial:
- Kick off with two coats of the tranquil light blue polish.
- Strategically position a nail strip diagonally across each nail.
- Paint over with the shimmering dark blue polish.
- Seal the oceanic allure with a clear coat for long-lasting brilliance.
15. Summer’s Delight: Strawberry Fields Dream
If you’re looking to add a fruity twist to your nail story, this strawberry-inspired art is your perfect match. A playful summer design, it’s vibrant, fresh, and absolutely delicious!
Essentials:
- Ripe red nail polish
- Lush dark green nail polish
- Refreshing light green nail polish
- Mellow yellow or pristine white nail polish
Tutorial:
- Lay down two coats of the ripe red polish for a juicy base.
- With a thin brush, sporadically place dots using either a mellow yellow or white polish to mimic strawberry seeds.
- At the nail base, craft the strawberry’s crown using dark green polish.
- For a dash of glam, consider embellishing with miniature white nail rhinestones. Place them randomly or adorn one specific nail for a feature look.
- Top off this summer saga with a clear polish, and let your nails do the talking!
- Venture into these captivating designs, and let your nails be a canvas for your creativity.
These three picks offer a beautiful mix of simplicity, charm, and vibrancy, making them perfect choices for nail art enthusiasts of all levels. Happy painting!
16. Midnight Glamour: Deep Blue Allure
Dive into the depths of this majestic design. The harmonious blend of glitter, dark blue, and a subtle hint of black is perfect for those who adore a hint of mystery combined with glamour.
Essentials:
- Enigmatic dark blue nail polish
- Starry blue glitter polish
- Mysterious black nail polish
- Optional: Sparkling rhinestones
Tutorial:
- Initiate with the starry blue glitter polish, focusing on the upper nail base as depicted in the image.
- Craft an elegant border using a thin brush and the mysterious black polish.
- Fill the remaining nail territory with the enigmatic dark blue shade.
- Conclude this deep sea journey with a glossy clear polish. Ready to dazzle!
17. Romantic Whimsy: Valentine’s Day Delight
Celebrating love has never been so stylish. This delicate, heart-inspired design is a sweet homage to romance, making it perfect for Valentine’s Day or any day you wish to spread a little love.
Essentials:
- Three romantic shades of pink polish
- Precision dotting tool
- Fine toothpick
Tutorial:
- Begin with a soft light pink base.
- With your medium shade of pink and the dotting tool, carve out charming heart shapes.
- Outline your hearts using the toothpick dipped in the darkest pink polish for added definition.
- Seal your love letters with a clear polish. Love is in the air!
18. Ethereal Charm: Triple Cloud Dreamscape
If a serene sky painted with fluffy clouds is your idea of tranquillity, this design brings that calm to your fingertips. With soft pastel hues, it’s a fresh twist on the classic French manicure.
Essentials:
- Serene pale pink nail polish
- Whispery white nail polish
- Daydream light blue nail polish
- Sunset pastel orange nail polish
Tutorial:
- Set the mood with a serene pale pink base.
- To sculpt the clouds, delve into the daydream light blue polish. Using a brush, craft gentle vertical arcs as your first layer of clouds.
- Add more depth by repeating the cloud design with whispery white and sunset orange polishes.
- Culminate your ethereal journey with a clear polish, capturing your dreamscape forever.
These designs effortlessly merge classic techniques with innovative twists. Whether you’re in the mood for deep elegance, romantic charm, or dreamy whimsy, there’s a design here to echo your spirit. So, why wait? Let your nails tell your story!
19. Aqua Dreams: Scales Nail Art Design
Transport yourself to an underwater world with this aqua-inspired design that’s as simple as it is charming. The playful combination of colours creates the illusion of shimmering mermaid scales.
Essentials:
- Mesmerising aqua-green nail polish
- Earthy beige nail polish
- Pure white nail polish
- Majestic purple nail polish
- Deep blue nail polish
- Precision brush
Tutorial:
- Lay a solid foundation with two coats of the mesmerising aqua-green.
- With your brush, begin crafting dots at the nail tip, moving upwards towards the base.
- To create the illusion of scales, vary the colours of your dots.
- Seal your oceanic dreams with a clear polish. Dive in!
20. Serene Elegance: Lavender Circles Nail Art
Evoking the calming presence of lavender fields, this design is a gentle embrace of colour that’s perfect for those looking for elegance with a playful twist.
Essentials:
- Delicate lavender nail polish
- Chic nude-grey nail polish
- Round nail art labels
Tutorial:
- Start with a lush lavender base.
- Once dried, position two round labels on each nail, leaving an inviting space in the centre.
- Fill that space with the chic nude-grey and delicately remove the labels while wet.
- Finish with a clear polish, capturing the essence of serenity.
21. Wild Instincts: Leopard Print Nail Art Design
Channel your inner wild side with this daring design that blends sophistication with a bit of edge. It’s an emblem of confidence and style.
Essentials:
- Elegant nude nail polish
- Warm light brown-beige nail polish
- Bold black nail polish
- Detailing nail art brush
Tutorial:
- Ground yourself with a refined nude base.
- Use the brown-beige polish and your brush to create imperfect spots, mimicking the random patterns of leopard prints.
- After it sets, use the bold black polish to outline each spot, allowing some spaces in between for a more authentic look.
- Conclude with a clear polish. Embrace the wild elegance!
Whether you’re looking to express your playful side, summon a touch of elegance, or unleash your bold instincts, there’s a nail art design tailored for you. Dive into these delightful designs and let your nails do the talking!
22. Rhythmic Beauty: Musical Notes Nail Art
For the music enthusiasts, here’s a design that sings aloud your passion. Let your nails strike a chord with this timeless musical composition.
Essentials:
- Soft nude nail polish
- Deep black nail polish
- Precision brush
- Dotting tool
Tutorial:
- Lay down a calming nude base.
- Using the precision brush, etch out three delicate horizontal lines towards the nail base.
- With the dotting tool, place a precise dot above these lines or alternatively, use black nail gems.
- Craft the iconic music notes with the precision brush.
- Finalise with a clear polish, and let your nails hum a tune!
23. Retro Reverie: Red And White Polka Nail Art
Step back into vintage charm with these classic polka dots. Red on white brings a refreshing yet nostalgic vibe.
Essentials:
- Crisp white nail polish
- Romantic red nail polish
- Nail strips or adhesive tape
- Dotting tool or toothpicks
Tutorial:
- Create a blank canvas with white nail polish.
- Place the nail strip or tape diagonally and colour in with passionate red.
- Dip your dotting tool into red polish and gently place dots on the white background.
- Seal with a glossy clear polish, and dance away in retro style!
24. Citrus Delight: Yellow Grapefruit Nail Art
Evoke the essence of summer with this juicy grapefruit-inspired design. Who said yellow is too much? It’s just right!
Essentials:
- Sunny yellow nail polish
- Soft pastel pink nail polish
- Snowy white nail polish
- Precision brush
- Nail strips
Tutorial:
- Illuminate your nails with a yellow base.
- Position a nail strip towards the nail tip and apply pastel pink.
- Draw fine white lines on the pink section to mimic the grapefruit texture.
- Conclude with a clear polish, and let your nails be the life of the beach party!
25. Spooky Chic: Halloween Skulls Nail Art
Celebrate All Hallows’ Eve with this quirky design that merges the mysterious with the cute. It’s a spooktacular treat for your nails!
Essentials:
- Enigmatic black nail polish
- Pure white nail polish
- Detailing brush
- Crystal-clear polish
Tutorial:
- Set the eerie mood with a dark black base.
- Use the detailing brush to craft white skull shapes.
- Add smaller dots beneath the skulls, bringing them to life.
- Dot on the black eyes, giving them character.
Get ready for some spooky admiration and nail the Halloween look!
From musical notes that convey your love for rhythms, to the vibrant hues of summer, these designs ensure you have a nail art for every occasion and mood. Dive into the world of nail creativity and let your fingers do the flaunting!
Perfecting simple nail art designs can be a trendy way to express yourself. If you’re dealing with short nails, consider using easily accessible acrylic or gel nails. Opt for designs that align with your nail shape, and practise good nail maintenance to ensure their health. Showcase your unique style with any of the nail art concepts provided earlier. Whether it’s a floral pink motif or a vibrant colour splash pattern, these designs are worth experimenting with. The detailed guides accompanying each design ensure a flawless finish. Whether for a special event or just to refresh your nails, give these patterns a go. Don’t hesitate to play with different shades to complement your attire!
Frequently Asked Questions
What does 3D nail art entail?
3D nail art refers to the addition of three-dimensional embellishments on nails, such as flowers, cartoons, droplets, lace, and bows. These decorative elements are usually crafted using coloured acrylic.
Is DIY nail art possible?
Absolutely! Many people opt to create nail art at home using tools like paintbrushes, stencils, and nail art stickers to achieve various designs.
Which are the fundamental nail art designs?
The quintessential nail art designs encompass styles like triple cloud nails, color splash nails, polka dots, plastic wrap designs, and the gradient effect known as ombre nails.
Do people still favour French manicures?
Certainly! The French manicure, characterised by its classic white tips, has stood the test of time. While the realm of nail art has seen a surge in imaginative designs, the timeless elegance of French nails endures. Modern twists, such as coloured or glitter tips and reverse French designs, have given it a fresh appeal.
Post nail art application, how can I maintain my nails?
To ensure your nails stay healthy and your design remains intact, regularly apply a moisturising hand cream or cuticle oil. Keeping nails neatly trimmed and filed prevents breakage. To prolong the life of your nail art, avoid direct contact with aggressive chemicals and always apply a protective top coat.
For grand events like weddings or prom, which nail art designs are trending?
For occasions demanding a touch of elegance, popular choices include glittery nails, intricate floral designs, minimalistic white chevron patterns, the gradient ombre effect, and sophisticated French manicures with intricate detailing. To elevate the look further, consider adding rhinestones or nail jewels for added sparkle.