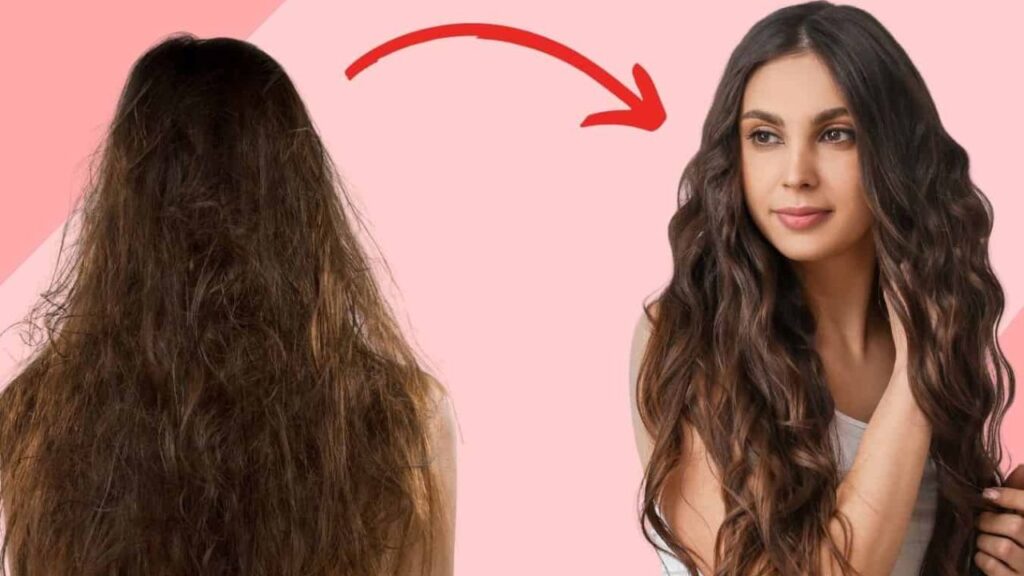
Imagine lounging on a golden beach, the sun warming your skin, while your flawless beach waves playfully dance in the breeze. We’ve all pictured this dreamy scenario, haven’t we? But when it comes to crafting those ideal waves, many of us find ourselves entangled in a struggle between overly curly locks and barely-there waves. No more! Dive into our handpicked guide for achieving that effortless wavy look without the fuss of hair tools that often miss the mark.
Through extensive research and a bit of hair magic, we’ve unearthed 10 straightforward methods to grant you those natural, wavy locks you’ve been yearning for. So, pop the kettle on, get comfy, and delve into our treasure trove of wavy hair secrets.
Face Shape and Wavy Hair: The Perfect Duo
- Triangle Faces: Wavy hair beautifully balances out the triangle face shape, drawing attention away from a prominent jawline, lending softness and allure.
- Round Faces: Waves add depth and volume to your mane, giving your round face a slimmer appearance and a splash of sophistication.
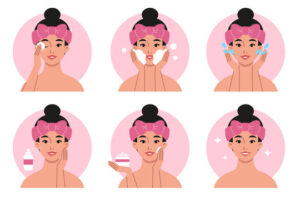
Wavy Hair Care Tips
- Less is More: Overwashing can rob your hair of its natural oils and bounce. To keep those waves looking fresh for days, opt for a quality dry shampoo to combat any oily build-up.
- Silky Dreams: Slumber on a satin pillowcase to maintain your wavy hairstyle’s integrity. It not only keeps your waves in check but also bids farewell to pesky frizz.
Now that you’re armed with these tips, it’s time to embark on your wavy hair journey. Embrace the waves, and let your hair do the talking!
How To Get Wavy Hair – 10 Easy Techniques
Unlocking Natural Waves: The Diffuser & Beyond
The magic of a diffuser extends beyond mere hair drying. It’s akin to wielding a wand that transforms limp tresses into curls and waves filled with volume and life. The diffuser’s unique mechanism retains the heat while minimising the intense airflow, giving your curls the gentle warmth they need to set without being blown out of shape. If you’ve ever doubted the curl potential in your locks, grab a diffuser and let those hidden waves spring to life.
But wait, the journey to beachy waves doesn’t end here. Continue your scroll and discover the mystical ‘Princess Leia Buns’ technique, among other secrets.
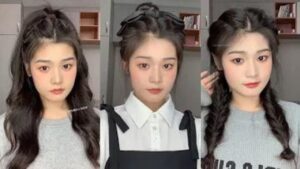
1. Princess Leia Buns Technique
Let the intergalactic vibes guide your hair transformation journey. By channeling the iconic Princess Leia, you’ll find yourself waking up to dreamy waves.
What You’ll Need:
- Hairbrush
- Anti-frizz serum
- Bobby pins
- A sprinkle of stardust (just kidding, but enthusiasm will do!)
Steps to Achieve Leia’s Look:
- Preparation: With damp hair, brush out any knots or tangles to ensure a smooth canvas.
- Combat the Frizz: Distribute a few drops of anti-frizz serum through your hair. This shields your locks from any moisture-induced chaos.
- Begin the Twisting: Part your hair down the centre. Take a 2-inch section near the left side of your parting, and twist. As you move along, incorporate more hair to the twist.
- The Bun Formation: Once you pass the ear, continue twisting to the hair’s end. Coil this into a bun and position it behind your ear. Secure with bobby pins or hair elastics, whichever you prefer.
- Right Side, Same Story: Mirror the process on the opposite side.
- Dreamy Waves Overnight: Let the force (or simply time) do its thing. Sleep with these celestial buns.
- Unveil the Waves: Come morning, release your hair from its buns. For an added touch of gloss, work a small amount of Argan oil through your waves.
And there you have it! Hair that’s not just ready for the beach, but perhaps even a galactic adventure.
2. The Hair Knotting Technique
Every once in a while, a hairstyling method emerges that makes us wonder, “Why didn’t I think of this earlier?” And, the hair knotting technique fits this bill perfectly. It’s an art form in its simplicity, and kudos to the creative mind that realised our hair could be transformed with just a few knots. Ready to embrace this knotty magic? Here’s how:
What You’ll Need:
- Hairbrush
- Claw clips or double prong clips
- Hairspray (preferably with a light hold)
Knot Your Way to Waves:
- Starting Right: With damp tresses, gently brush your hair to ensure it’s free of any tangles. This sets the stage for even and smooth waves.
- Begin the Knotting: Take a 3-inch section of hair from the front. Now, imagine you’re about to tie a shoelace. Create a loop with the hair near its roots.
- The Knot’s Secret: Pull the tail end through the loop, but – and this is key – don’t pull it all the way through. You’re aiming for a half-tied knot.
- Secure the Knot: Using a claw clip or double prong clip, pin this knotted section securely to your head.
- Repeat the Charm: Continue this knotting dance with the rest of your hair. The beauty of this technique is in its flexibility; you can adjust the size of the sections based on the intensity of waves you desire.
- Patience is Key: Allow your knotted creation to sit and dry naturally. This could take a few hours, but it’s worth the wait.
- Set the Waves: Before you embark on the great unknotting, give your hair a gentle misting with hairspray. This helps in retaining the wavy structure.
- The Grand Reveal: Delicately untie each knot, unfurling the waves. For a dreamier, soft appearance, brush through your newly-formed waves gently.
- This technique isn’t just about achieving wavy hair; it’s a testament to the wonders of creative hairstyling. The next time you flaunt your waves, remember, it’s all knotted magic!
3. Twisted Crown Technique
Who said crowns are only made of gold and jewels? Sometimes, they’re crafted from the very locks that grace your head. Embrace your regal essence with the Twisted Crown Technique, turning your tresses into a royal diadem as you dream. And, when morning dawns, your crown transforms into stunning waves fit for a queen.
What You’ll Need:
- Bobby pins
- U-pins
- Light hold hairspray
The Royal Routine:
- Begin with a Base: On damp hair, draw a central parting, separating your mane into two equally majestic sections.
- Twist & Conquer: Start with the left section. With gentle determination, twist your hair all the way to its ends.
- Crown Creation: Lay this twisted hair like a royal tiara across your head, ensuring its end nestles securely behind your right ear.
- Secure Your Crown: Like securing the jewels in a real crown, use bobby pins and U-pins to hold your twisted hair in place. This ensures your crown remains undisturbed as you rest.
- Mirror the Majesty: Now, turn your attention to the right section and replicate steps 2 to 4. This completes the regal loop of your hair crown.
- Dream with Your Crown: Let your hair embrace the twists overnight. As you sleep, the moist locks will mould into the waves you desire.
- Reveal Your Royal Waves: As a new day begins, mist your hair lightly with hairspray for added hold. Gently unfurl your crown and let your waves cascade down, revealing the beauty of your regal hair.
Remember, it’s not the crown that makes the queen, but the heart. Let your hair, whether in crown or waves, reflect the royalty that resides within.
4. The Scarf Technique
Ever thought of multitasking with style? The Scarf Technique not only gives you a chic look but also ensures that you wake up with the most splendid waves. It’s like enjoying two hairdos for the price (and effort) of one!
What You’ll Need:
- Texturizing spray
- A chic scarf (preferably silk or satin for a smoother finish)
- Hair elastic
Wrap & Roll to Wavy Glory:
Texture Time: Begin with damp hair and generously spritz on your texturizing spray, ensuring it reaches from roots to ends.
Ponytail Prep: Secure a hair elastic around your hair, placing it just a few inches above its ends. This will help control the hair as you work with the scarf.
Scarf’s Starting Knot: Lay your scarf flat and tie a simple knot at its midpoint. This acts as a base for the rolling process.
Position & Flip: Position the knotted part of your scarf at the nape of your neck. Then, with panache, flip the tail end of your ponytail over the scarf.
Roll & Wrap: As if you’re rolling dough into a croissant, begin to roll the scarf towards your head, making sure your hair is wrapping neatly around it.
Seal the Deal: Once you’ve reached the roots, tie the free ends of the scarf atop your head. Ensure it’s comfortable yet secure.
Beauty Sleep: Rest with your stylish wrap on. Let the magic unfold as you sleep.
Wave Awakening: Greet the morning sun and gently untie your scarf, unveiling hair that flows in soft, cascading waves.
Apart from waking up with fabulous waves, you get the added bonus of sleeping in a retro pin-up look. The Scarf Technique truly is beauty wrapped in elegance!
5. The Straightened Braids Technique
Isn’t it intriguing when we use modern tools on age-old techniques to create magic? This method combines the timeless beauty of braids with the efficiency of a straightener, producing wavy results that are nothing short of spectacular.
What You’ll Need:
- Hair elastics
- Hair straightener
- Light hold hairspray
The Step-by-Step Guide to Wavy Brilliance:
Preparation: Start with completely dry hair. Depending on its thickness and length, partition your hair into several sections.
Braid Away: Braid each section neatly. The number and size of the braids will dictate the intensity and definition of the waves. More braids mean tighter waves.
Flatten Those Braids: A crucial step! Gently press and loosen the braids to ensure they lie flat. This allows the heat to distribute evenly when straightening.
Straightener in Action: Begin at the top of your first braid. Clamp your straightener down, holding it for a few seconds. Then, move slightly further down the braid and clamp again. Continue this process until you reach the end of the braid.
Uniformity is Key: Work the straightener down each braid, ensuring you treat them all with the same love and care.
Set and Secure: Before the great unravelling, mist your braids with a light hold hairspray. This not only sets the waves but adds longevity to your style.
Unravel and Volumise: Gently undo each braid, revealing your newly-formed waves. For a fuller, bouncier look, give your hair a gentle tousle.
It’s fascinating how a tool designed to straighten hair can also be a passport to wavy paradise. The Straightened Braids Technique is a testament to the versatility of hairstyling – a blend of the past and present, creating a style that’s perfect for the here and now.
6. The Hair Scrunching Technique
Ever felt the allure of wavy locks that seem effortless yet undeniably sultry? Dive into the Hair Scrunching Technique, which epitomises simplicity, making you feel like you’ve just stepped off a beach, with the ocean breeze still playing with your hair.
What You’ll Need:
- Volumizing mousse
- A soft towel
Steps to Sea-Swept Waves:
Mousse It Up: Fresh out of the shower? Perfect. Gently work a generous dollop of volumizing mousse through your damp hair. This provides the hold and texture necessary for the waves to take shape.
Towel Time: Using a soft towel, press and blot your hair to remove as much excess water as possible. Remember, we’re not rubbing the hair, as this can cause unwanted frizz.
Gravity’s Role: Lean forward, allowing your hair to cascade in front of you. This position aids in creating a natural wave formation.
Handy Magic: Place sections of your hair in your palm. Gently scrunch upwards, from the tips to the roots, holding the hair momentarily in a scrunched position. Imagine you’re gently crumpling a piece of paper – it’s that easy!
Repeat & Set: Continue the scrunching process every 10 minutes or so. As your hair dries, the waves will set into place.
Unveil your new, naturally wavy look! What makes the Hair Scrunching Technique so enchanting is its minimalism. It’s a no-fuss approach, yet the outcome is a head full of bewitching waves. So go on, let your hands do the talking and your waves do the walking!
7. The Snake Braiding Technique
For those who adore drama and flair, the Snake Braid is an enchanting dance between precision and artistry. It’s a Dutch braid that slithers its way around your head, doubling as a spellbinding hairstyle before revealing cascading waves.
Essentials for the Technique:
- Hair elastic
- Light hold hairspray
- Hair brush
Your Stepwise Guide to Wave Magic:
Sleek Start: On damp hair, glide through with a brush, ensuring there are no knots or tangles. This helps create a seamless braid.
Head Tilt: Flip your hair forward, letting it flow naturally in front of you.
Begin the Braid: Start close to the nape of your neck, near your left ear. Initiate your Dutch braid horizontally.
Braiding Basics: Grab a 2-inch section, separating it into three strands. As you progress, the side strands should flip underneath the middle one. With each crossover, integrate more hair into the braid.
Snake’s Turn: Once your braid sneaks its way to your right ear, it’s time for a U-turn! Reverse direction, and continue your braid, ensuring the ‘snake’ pattern becomes evident.
Tail End: When there’s no more hair left to add, simply braid the remaining length in a traditional manner. Neatly pin this tail against your head, allowing the snake pattern to be the showstopper.
Patience is Key: Let your hair be ensnared in the snake braid until it’s completely dry. This ensures the waves set in beautifully.
Set and Unravel: Just before you’re ready to release your waves, give your braid a light spritz of hairspray. Gently unfurl the braid and use a brush to softly separate and define your waves.
The Snake Braiding Technique isn’t just about creating waves; it’s an experience. You start with a braiding ritual that’s as hypnotic as a snake’s charm and end with waves that cascade like they’ve been touched by Medusa herself.
8. The Fishtail Braid Technique
Unleashing the gentle waves of the ocean onto your hair has never been simpler. The fishtail braid, known for its herringbone weave, is your ticket to chic, carefree waves. No fuss, no fiddle – this method is as easy as it is effective. Let’s dive straight into it, shall we?
Tools of the Trade:
- Texturizing spray
- Hair elastic
Your Styling Steps to Oceanic Waves:
Preparation: When your hair is almost dry, bless it with a generous mist of texturizing spray to provide the perfect foundation.
Divide to Conquer: Part your hair into two equal sections, prepping it for the fishtail dance.
Interweave Left: Snatch a fine strand from the outer edge of the left section. Cross this strand over, making it a part of the right section’s inner edge.
Interweave Right: In a mirror action, take a delicate strand from the outer realm of the right section and meld it with the inner sanctum of the left section.
Harmonious Dance: Continue the ebb and flow of steps 3 and 4. As the two sections intermingle, watch the fishtail pattern emerge beautifully. When you near the end, tie the braid using your hair elastic.
Dreamy Waves Overnight: Tuck yourself into bed with the braid securely in place. Let dreams and time work their magic.
Morning Unveiling: With the dawn’s first light, release your hair from its braid. Give it a gentle tousle, and behold – cascading, elegant waves that mirror the mesmerising dance of the ocean.
9. The Friar Tuck Technique
Ladies, if you’ve always had a secret love affair with tales of yore, I’ve got the perfect style for you. The Friar Tuck technique is not just a nod to the legendary monk, but also a tribute to the easy elegance of yesteryears. And while the slingshot just might have given you a chuckle, the waves this method delivers are no laughing matter. They’re sheer perfection.
Gather Your Tools:
- Hairbrush for smooth sailing
- Sea salt spray for that beachy texture
- An elasticated headband
- A silk scarf (to ward off frizz and unruly spirits)
- Dry shampoo for an extra oomph
Steps to Regal Waves:
Tangle-Free Territory: Ensure your hair is free from rebellious knots with a thorough brushing session.
Central Divide: Gracefully part your hair down the middle, creating two even sections.
Oceanic Mist: To recreate the allure of a beach day, spritz on some sea salt spray to lightly dampen your hair.
Headband Placement: Don the headband, letting it rest majestically across your forehead. Ensure all your hair nestles beneath it.
The Tuck Ritual: Begin your mediaeval dance by taking a 2-inch section from the left side. With an upward flourish, tuck this section under the headband. As you proceed, keep adding more strands and continue the upward tucking motion.
Unite at the Back: Once you’ve charmed the left side, initiate the same tucking rite on the right. Meet in the middle, at the back of your head.
Sleeping Beauty: Drape the silk scarf around your head, ensuring all your tucked hair is covered. This not only prevents nocturnal frizz but also adds a touch of vintage glamour. Drift into dreams of castles and knights.
Morning Awakening: As dawn’s first light kisses the sky, gently unravel your hair from its regal confines. Use a brush to gently weave through any tangles.
Final Flourish: Breathe life and longevity into your waves with a spritz of dry shampoo. The hold and volume will make you feel like you’re stepping right out of a fairy tale.
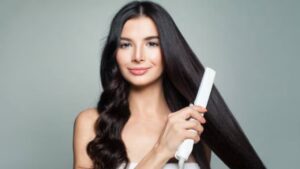
10. The Flat Iron Technique
Introduction:
In the fast-paced world of today, we don’t always have hours to style our hair. For days when you’re running against the clock, the Flat Iron Technique is your knight in shining armour. With a trusty straightener in hand, you can transform straight strands into wavy wonders in just a few minutes. It’s the kind of magic you need for last-minute plans!
Tools of the Trade:
- Dry shampoo to freshen up those locks
- A 1.5-inch flat iron for the ideal wave width
- Sea salt spray for that just-back-from-the-beach look
- Light hold hairspray to keep those waves dancing all day
Quick Guide to Effortless Waves:
Freshen Up: Start with a burst of dry shampoo at the roots to absorb any excess oil and give your hair some lift.
Half & Half: Section your hair by pinning up the top half, leaving the bottom half free for curling.
Twist & Turn: Using the flat iron, gently clamp a section of the lower hair and twist it away from your face, pulling the iron through to the ends to create a soft wave.
Top Tier Time: Release the pinned top half and repeat the curling technique for a full head of waves.
Beachy Boost: For that added sun-kissed touch, spritz on some sea salt spray. Scrunch your waves with your hands for a more tousled look.
Set & Forget: A light spray of hairspray ensures your waves won’t go astray, no matter how hectic your day.
Pro Tip: As you use the flat iron, remember to gently pull away from your face while twirling, this ensures your waves have that lovely bounce. And a golden rule to remember – always, ALWAYS use a heat protectant before exposing your precious locks to any heat.
In less time than it takes to pick out an outfit, you’ll have a head full of lovely waves, ready to tackle whatever the day throws at you! Perfect for modern-day mavens on the move.
Making Waves: Everything You Need to Know About Wavy Hair
The sun is out, the air is warm, and summer vibes are all around. What better time to embrace the beauty of wavy hair? These styles are a fabulous way to add volume and texture to your locks, especially during the summer season. From barely-there waves to beachy tresses, our tutorials will guide you on your journey to the perfect summer mane. Before you dive in, let’s tackle some common questions about wavy hair.
Frequently Asked Questions:
1. What causes wavy hair naturally?
Natural waves are a blend of genetics, environmental factors, and changes in our body:
Genetics: Your DNA plays a significant role in determining your hair texture.
Humidity: Hair often reacts to the moisture in the air, which can lead to natural waves or curls.
Hormonal Changes: Pregnancy, puberty, and menopause can influence hair texture due to hormonal shifts.
2. How do you make wet hair curly?
While you can’t turn wet hair permanently curly without potential damage, there are ways to achieve temporary curls:
Braiding: Plait damp, detangled hair and leave it overnight. Unravel in the morning for beautiful waves.
Twisting: Twist sections of damp hair, secure with pins, and leave overnight. Release the next day for relaxed curls.
3. Does salt make hair wavy?
Indeed, salt can give your hair that coveted beachy texture:
Salt’s Effect: The salt draws out moisture from your hair, causing it to contract and form waves.
Beach Sprays: Many beach or wave sprays in the market contain sea salt to help achieve that tousled look.
4. Is there a way to get wavy hair permanently?
For those seeking a more lasting wave, there’s an option:
Wavy Perm: This salon treatment uses chemicals to alter the hair’s structure, producing permanent waves. It’s essential to discuss with your stylist about the suitability of a perm for your hair type.
Conclusion:
Embracing wavy hair can be a fun way to change up your style, especially during the sunny season. With our tutorials and a clearer understanding of what goes into achieving that wavy look, you’re all set to rock those waves! Just remember to care for your hair, use the right products, and most importantly, enjoy the process and your new look. Summer, here you come!